Repairing Orff Instruments
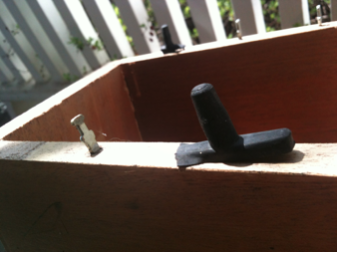
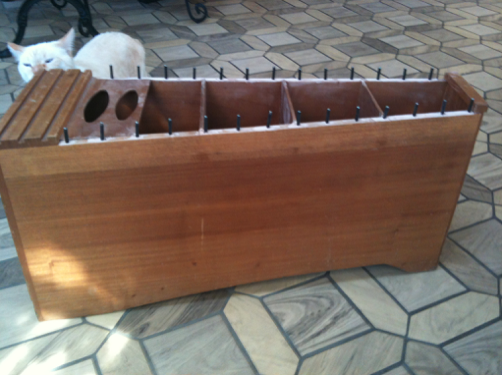
My students love to work with our Orff mallet instruments. We only have 10 at the present time and there won’t be a budget to purchase more in the near future let alone replace what we currently own. To make matters worse our building went through a fire about 9 years ago when the music room was in the basement. Fortunately there was no fire or smoke damage, but there was water damage that wasn’t found until long after the insurance settlement was hashed out. The bass xylophones were stored on the floor for the summer and were soaked pretty badly. When I transferred to Central three years later I could only find full sets of keys for 2 out of the 4, the wood had pulled apart and all the wood was very dry. At the end of my first year the music room was moved to a classroom upstairs and I took the bodies home for a good cleaning, oiling and some repair. The best two I kept for use, storing a third just in case. This year I finally needed to get the basses ready for more use. Finding parts, however, proved difficult. Flat metal inserts were used with a special rubber gasket that fit over the exposed part and identical replacement parts are no longer made. You can see my problem in the picture below:
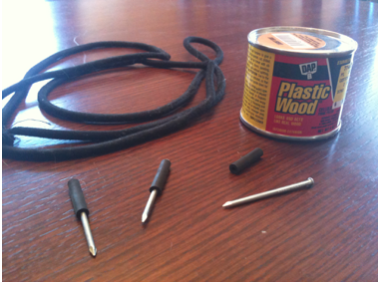
Some of the metal pins were beginning to rust from the previous water damage and were close to snapping off, so they had to be replaced. I took a trip to my local hardware store and explained the problem. This store is wonderful – they often had helped me in the past when I was looking for cheaper alternatives. Replacing parts on marching carriers can be a costly task! They immediately had an inexpensive, easy solution for this problem. Many thanks to Cottin’s Hardware in Sturgis, MI! All I needed for this project was nails, 1″ small-gauge rubber tubing bits, some wood fill and an elastic band (which I already had in a miscellaneous bag of replacement parts I found in a closet). My total cost at the hardware store was $7.29. They recommended the Plastic Wood by DAP because it would set much harder and wouldn’t crumble.
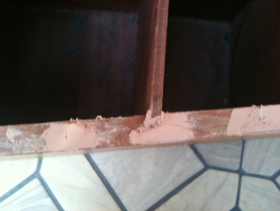
My first task was to measure the distance between the inserts. As a secondary measure, I marked the inside of the body as well so I could see exactly where the pins had been. I then took a pair of heavy pliers and pulled all the inserts, which was a task for the 5 or 6 that decided to snap off. The next step was to fill the holes. This product dries VERY fast, so I used a flat head screwdriver that was small enough to give me more control.
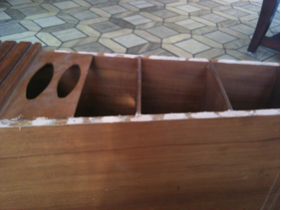
After 4 hours of drying time it was fully set and ready for sanding. The final step was to put the tubing on the nails and carefully drive the nails at the markings, stopping when the tubing was flat to the wood. The covered elastic loop fit neatly around the outside of the nails, giving a great flat surface for the bars to resonate. Everything fit firmly, with little bounce when I play tested. I had to adjust a few nails on each one to straighten them a bit and found I only had to move one. Here is a photo of the finished product before I gave them a final cleaning with a bit of lemon oil. Our flame point Siamese, Nikki, was very curious through the entire process and probably would have helped if he had thumbs!
My students were thrilled at how much easier they were to play and the sound was much better than before. So far the repair has held up beautifully after several years of almost daily use.
If you are in need of cord, this product is identical to the replacement cord I already had on hand. All you need to do is cut it to the length required and sew the ends firmly together.
